Showing posts with label Howto. Show all posts

Sunday, November 22, 2009

VLAN testing in ESX 3.5

In larger organisations, typically, the network department and the VMware group are seperated in different teams. So as a VMware administrator you need to ask the network department to trunk VLANs to the physical switch ports that your ESX is connected to. It happens that the network department misses a port or a VLAN which means that you can end up with a VM loosing network connection after e.g. a VMotion. Unfortunately, the responsibility can land on the VMware administrator for putting a host into production without testing VLAN connectivity. Unfair, but that's life.

But testing VLANs the manual way is rather time consuming. Especially if you have multiple hosts with multiple nics and multiple VLANs. The number of test cases quickly amount to the impossible. If, for example, you have five hosts, five VLANs and 4 NICs in each host, that means (5 x 5 x 4) 100 test cases.

The traditional way of testing is to create a vSwitch with only one vmnic connected. Then connect a VM on that vSwitch with one of the VLANs. Configure an IP address in the address space of the VLAN and ping the gateway. Do this for all the VLANs, and then connect the next vmnic to the vSwitch and start over.

The following method speeds up VLAN testing significantly (in this case from 100 to 16 test cases). It is not totally automated, but I have found it very useful nonetheless.

The basics of it is that you configure a port group to listen on all available VLANs and then you enable VLAN tagging inside the VM and do your testing from there:

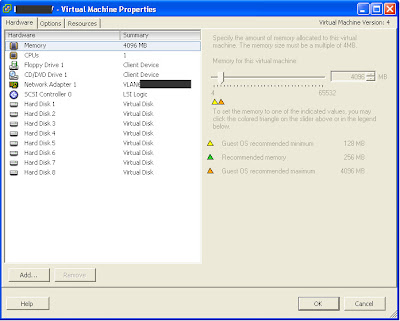
1. Create a port group on the vSwitch with ID 4095. This will allow the VM to connect to all available VLANs available to the host.

2. Enable VLAN tagging from inside the VM. This only works with the E1000 intel driver which only ships with 64 bit Windows. So if you have a 32 bit Windows server, then you need to first modify the .vmx file and then download and install the intel E1000 driver from within Windows (Update: Even for Win 64 bit, you need to download and install E1000 manually. The advanced VLAN option is not included in the default driver). This link describes how this is done. Note that when modifying the .vmx, add the following line:

Ethernet0.virtualDev = "e1000"

Note that if you use the default Flexible nic to begin with, there's no existing entry for the nic in the .vmx, so just add the new entry.

Under Edit Settings for the VM, attach the NIC to the VLAN with id 4095.

3. Now you can add VLANs in the VM. Go to the Device Manager and then Properties for the E1000 NIC. There's a tab that says VLANs (see screendump below). As you add VLANs, a seperate NIC or "Local Area Connection" is created for each VLAN. It is set for DHCP, so if there's a DHCP server on that network it will receive an IP automatically. If not, you will need to configure an IP for that interface manually (e.g. by requesting a temporary IP from the network department.). For quickly configuring the IP, you can run the following command from CMD or a batch (.cmd) script:

netsh int ip set address "local area connection 1" static 192.168.1.100 255.255.255.0 192.168.1.254 1

4. Now we will use the Tracert (traceroute) command to test connectivity. The reason that we can't use Ping is the following: If you have multiple VLANs configured and you ping a gateway on a given VLAN - and the VLANs happen to be routable - then you will recieve a response from one of the other VLANs even though the one your are testing is not necessarily working.

But when using Tracert, then you can be sure that if the gateway is reached in the first jump, then the VLAN works. If the VLAN doesn't work, then you will see Tracert doing multiple jumps (via one of the other VLANs) before reaching the gateway (or it will fail if there's no connectivity at all). You can create a simple .cmd file with a list of gateways that you execute from the CMD prompt. Example file:

tracert 192.168.1.254
tracert 10.10.1.254
tracert 10.10.2.254

See below for example screendump.

Before running the batch script you need to have only one physical nic connected to the vSwitch. You can do this in one of two ways. 1) create a seperate vSwitch and connect only one vmnic at a time. Then you control it from VC. Or 2) you unlink all vmnics but one from the service console (COS) with the following commands:

ssh to the ESX host
esxcfg-vswitch -l (to see current configuration)
esxcfg-vswitch -U vmnic1 vSwitch0 (this unlinks vmnic1 from vSwitch0)
esxcfg-vswitch -L vmnic0 vSwitch0 (this links vmnic0 to vSwitch0)

These commands work instantaneously so you don't have to restart the network or anything. Then you run through the test on one vmnic at a time. When done with a host, you VMotion the VM to the next host in the cluster and continue the test from there.


Saturday, November 14, 2009

Howto: Using Find command in Service Console

From time to time you need to locate stuff in the service console and the only command you got is find. 'Locate' unfortunately hasn't been included in the COS. Typically, I forget the syntax and think of another way of locating files - but actually it's pretty simple.

to use the Find command, do the following:

#find / -name searchstring
(#find 'path' -name 'searchstring')

so, if your looking for sshd_config file somewhere in /etc/ it would look like this:

#find /etc/ -name ssh_config

this will be a search on the complete file name. You can use wild cards as well, e.g.:

#find /etc/ -name ssh_co*

Wednesday, October 14, 2009

Howto: Permission wars in VI3

UPDATE: This setup doesn't entirely work. Templates aren't visible to the users...

This past week, I have been working on an interesting problem. A new internal customer wanted a development environment where they could free hands to deploy and delete VMs, take snapshots etc. To more or less have free hands and the VMware team should provide the virtual infrastructure as a service.

Now, from a virtual infrastructure operations perspective, to give a customer that much freedom is a bit of an administrative nightmare. For example, how do you ensure that a cluster is not overcommitted and how to make sure that all servers are properly registered in the CMDB.

To address the most important issue - from a technical perspective: The customer should not be able to overcommit the cluster. If they have that possibility, then we can't do maintenance, there won't be full failover. The obvious way to go about it is to enable HA and then to check the 'Prevent VMs from being powered on if they violate availability constraints'. However, HA does not have the most sensible way of calculating HA slot sizes and if you only have two hosts in a cluster, then you risk not being able to deploy a new VM even though there are plenty of resources in the cluster.

A colleague of mine suggested that I create a root resource pool in the cluster and then add permissions only on that resource pool and not on the host, cluster, or datacenter level. In theory, this is a pretty good idea, as you can set a hard limit on the resource pool for memory usage (which in my experience is the typical, visible, limiting factor in the cluster). In this case, I set a limit of 50% of available memory and then made the resource pool non-expandable. The resource pool limits in relation to actually used memory - not what is assigned to the VMs, see below.


I created a role similar (I think ;-)) to virtual machine administrator, which can more or less anything at the virtual machine layer (deploy, delete, change, snapshot, mount ISO's etc.) and added this at the resource pool layer. When I started testing, I discovered a number of issues. First, I couldn't create a VM, I couldn't delete a VM, and I couldn't browse the datastore from the VM summary page. But these permissions were already given to the role. If the same role was applied to the cluster or datacenter level, then it worked fine. So it makes a difference at which level the permisssions are applied.

If I apply the role at the cluster level, then everything works in an acces rights perspective, but then the role have too many permissions. Then, they can deploy servers directly in the cluster and will not be forced to deploy into the root resource pool. And then control is lost.

The only way I could work around this issue was to create two seperate role with two different permission sets and then apply them at two different levels of the datacenter.

The first role has very few permissions and is applied at the datacenter level (do not propagate) (this could also be at cluster level, but currently I only have one cluster in the datacenter...). The second role is the actual role that I created in the first place. This role was applied to the cluster level (propagate rights) where a hard limit has been defined for memory.

Below is listed the permission mapping that I have used for both roles.

With setup, the user is completely locked down, so they can only deploy servers in the defined resource pool and they will not be allowed to overcommit. If they do, the VM's won't be able to power on.

In relation to snapshots and running out of space on the LUN, this problems still persists but will not be addressed in this article.

Role 1 (do not propagate rights) - to be applied at datacenter level

Virtual Machine.Inventory.Create

Virtual Machine.Inventory.Remove (otherwise one can’t delete VM from disk)

Virtual Machine.Configuration.Add New Disk

Datastore.Browse Datastore (to be able to browse datastore from VM summary view)


Role 2 (propagate rights) - to be applied at resource pool level

Datastore.Browse Datastore

Datastore.File Management

Virtual Machine.Inventory.Create

Virtual Machine.Inventory.Remove

Virtual Machine.Inventory.Move

Virtual Machine.Interaction.Power On

Virtual Machine.Interaction.Power Off

Virtual Machine.Interaction.Reset

Virtual Machine.Interaction.Answer Question

Virtual Machine.Interaction.Console Interaction

Virtual Machine.Interaction.Device Connection

Virtual Machine.Interaction.Configure CD Media

Virtual Machine.Interaction.Tools Install

Virtual Machine.Configuration.Rename

Virtual Machine.Configuration.Add Existing Disk

Virtual Machine.Configuration.Add New Disk

Virtual Machine.Configuration.Remove Disk

Virtual Machine.Configuration.Change CPU Count

Virtual Machine.Configuration.Memory

Virtual Machine.Configuration.Add or Remove Device

Virtual Machine.Configuration.Modify Device Settings

Virtual Machine.Configuration.Settings

Virtual Machine.Configuration.Change Resource

Virtual Machine.Configuration.Reset Guest Information

Virtual Machine.Configuration.DiskExtend

Virtual Machine.State.Create Snapshot

Virtual Machine.State.Revert to Snapshot

Virtual Machine.State.Remove Snapshot

Virtual Machine.State.Rename Snapshot

Virtual Machine.Provisioning.Customize

Virtual Machine.Provisioning.Clone

Virtual Machine.Provisioning.Create Template From Virtual Machine

Virtual Machine.Provisioning.Deploy Template

Virtual Machine.Provisioning.Clone Template

Virtual Machine.Provisioning.Mark as Template

Virtual Machine.Provisioning.Mark as Virtual Machine

Virtual Machine.Provisioning.Read Customization Specifications

Virtual Machine.Provisioning.Allow Virtual Machine Download

Virtual Machine.Provisioning.Allow Virtual Machine Files Upload

Resource.Assign Virtual Machine to Resource Pool

Resource.Migrate

Resource.Relocate


Thursday, October 8, 2009

Howto: Check if SAN cables are connected in ESX

When installing an ESX host and you have someone other than yourself taking care of the cabling of the host, it is very handy to be able to check wheather this has been done properly. You want to be able to verify that the HBA's have been physically connected to the fabric switches with fibre cables.

Ssh to the ESX host
ls to the /proc/scsi/qla2300 folder (if it's a Qlogic HBA...)
In this folder there are a number of text files named with the numbers 1-x corresponding to the number of HBA ports in your ESX.
Cat the files one at a time:

#cat 1
or
#cat /proc/scsi/qla2300/1

look for the following line in the files:

Host adapter:loop state=READY, flags= 0x8430403

If it says READY, the HBA has been physically connected to the fibre switch. If it says DEAD, then it is not.

Friday, September 11, 2009

Howto: Removing a disk from a VM - howto identy the right disk?

From time to time, we need to remove disks from a VM. If there's only two or three disks attached to the VM, it's typically not a problem figuring out which one to remove e.g. if the disks have different sizes. But if you have seven or eight disks and they are the same size, then it's a bit more tricky - let's say if you're asked to remove the 'E-drive'. Under 'Edit Settings' for the VM, the disks only have a number which does not necessarily correspond with anything within the VM.

So how to identify exactly which disk that corresponds with a given volume within Windows?


The match can be made by looking at the SCSI target ID for the disk - this can be identified both in WIndows and under 'Edit settings' for the VM (A VM can have four SCSI controllers with up to 15 disks on each controller, so a maximum of 60 disks per VM).

To identify SCSI target ID within the VM:
Go to Computer Management -> Disk Management
Right click a disk and choose Properties


On the General tab you will see the Bus number (SCSI controller) and the Target ID (SCSI target ID), note the number - in this case below the ID is 4.


To identify SCSI target ID from the VI client:
Now go to 'Edit Settings' for the VM under and locate the disk with the corresponding target ID (see Virtual Device Node for the disk). Make sure the that the controller number and SCSI ID is the same. In this case it is Hard Disk 5 that have SCSI ID 4.

Shut down the VM to remove the disk.

Saturday, June 20, 2009

Howto: Getting the Navisphere Agent for ESX Server

There are several post in the forum about where to download the EMC Navisphere agent. Navisphere is an agent that you install in the Service Console on your ESX Server which helps to manage EMC Clariion storage systems. Click here for more info.

The agent is not publicly available for download. If you have a partner login, then I believe you can download it at http://powerlink.emc.com/ .

The way to go to get the agent is via your storage department. Either they can get the login for you or have them contact EMC, then they will send the software. Navissphere is shipped together with the Clariion storage systems on the Navisphere Server Support CD (see this article page 16). But contact EMC if you want to be sure to have the latest version.

In this document on page 7, it is stated that Navisphere v6.22 is compatible with ESX v3.5

Saturday, June 6, 2009

Howto: 101 Scripting ESX server installation on vSphere 4

I have been wanting to look into scripted ESX installations for a while now but haven't gotten around to it untill now. At first glance it looks a bit complicated - there a several much used deployment tools around (e.g. EDA and UDA), people are posting bunches of deployment scripts etc. I wanted to know the absolute basics - what is the simplest way to script an ESX installation?

First off, I recommend that you download the ESX and vCenter Server Installation Guide and read pp. 43-58 on scripting installations. This documentation helped me to get started more than posts on the web.
On ESX 4, there are two built-in scripts that you can run when you boot the installation CD: 'ESX scripted install to first disk' and 'ESX scripted install to first disk (overwrite VMFS)'. But that's a little boring as these scripts can't be modified.


In stead, we can let ESX server generate a script for us based on your own installation. I like this way as it simplifies things compared to the very comprehensives scripts out there - and it fits to your environment. Better to have a simple script that works than to have a do-it-all script that doesn't. You can always expand it later.

When you install ESX 4 in the default graphical mode, then a Kicstart script (ks.cfg) with your specific settings is generated and placed in the /root/ folder of your ESX installation. Make a copy of this file, as this is the one we will be using as our base script.

This script is to be copied to the root of the installation ISO. To do that, you need an ISO modifying tool like MagicISO (you need to pay 29$ to make ISO's larger than 300 MB). Open the ESX 4 installation ISO in MagicISO and copy the ks.cfg file into the root of the ISO.

Now, boot your server with the ESX ISO. When the first installation screen shows as below, then hit F2 to get 'other options'. Then shift down to the 'ESX scripted install using USB ks.cfg'. We will not be installing from USB, we will just use the command as a template and modify it to get the ks.cfg script from the CD in stead.

Modify the boot options command like this:

Boot options initrd=initrd.img vmkopts=debugLogToSerial:1 mem=512M ks=cdrom:/ks.cfg quiet

That's it. This will do a basic scripted installation of the ESX 4 server...


Mini troubleshooting: I tried to reinstall the ESX server that I had already installed, which means that there is already a VMFS partitioned disk on the server. So the clearpart command needed the --overwritevmfs flag to work. Furthermore, in the partitioning section I had to comment out some lines and in stead uncomment the 'part' commands with the --firstdisk flags.

I have pasted the basic script below for reference.

----------------sample ks.cfg----------------------
# Don't edit script in notepad or Word. Use Notepad++ or like app

accepteula

keyboard dk

auth --enablemd5 --enableshadow

#I have added the '--overwritevmfs' flag which is
#necessary when reinstalling an existing ESX

clearpart --overwritevmfs --firstdisk

install cdrom

#The encrypted password is taken from the original
#graphical install

rootpw --iscrypted $1$k364YM8i$CyveR0PWuw294uX8HLzcE0

timezone --utc 'Europe/Stockholm'

network --addvmportgroup=true --device=vmnic0 --bootproto=dhcp

part '/boot' --fstype=ext3 --size=1100 --onfirstdisk
part 'none' --fstype=vmkcore --size=110 --onfirstdisk
part 'Storage1' --fstype=vmfs3 --size=8604 --grow --onfirstdisk

virtualdisk 'esxconsole' --size=7604 --onvmfs='Storage1'

part 'swap' --fstype=swap --size=600 --onvirtualdisk='esxconsole'
part '/var/log' --fstype=ext3 --size=2000 --onvirtualdisk='esxconsole'
part '/' --fstype=ext3 --size=5000 --grow --onvirtualdisk='esxconsole'

%post --interpreter=bash

----------------sample ks.cfg EOF----------------------

Wednesday, May 6, 2009

Howto: Network configuration from the Service Console

Configure service console ip from scratch

If you have screwed up your network configuration and you have lost the connection to your ESX host, here's a couple of commands to configure the network settings from scratch (alternatively, you can try the new console-setup tool that has been introduced as of ESX4.0 U2).

First, delete the service console port group (the vswif) and then delete the virtual switch (typically vSwitch0) so you can start from scratch:

esxcfg-vswif -d vswif0
esxcfg-vswitch -d vSwitch0


(To remove a vMotion portgroup named vMotion: esxcfg-vswitch -D vMotion vSwitch0. If you have an active vMotion portgroup you may recieve the following error when trying to delete the vSwitch: Failed to remove portgroup: vMotion, Error: Unable to delete portgroup "vMotion", for the following reasons: 1 active ports, VM Kernel NIC. In that case, use esxcfg-vmknic to delete active NIC: esxcfg-vmknic -d -p vMotion)

Then create a new vSwitch, attach one or more pnics, add a service console port group (vswif), and configure and ip address for the service console:

esxcfg-vswitch -a vSwitch0

esxcfg-vswitch -L vmnic0 vSwitch0
esxcfg-vswitch -L vmnic1 vSWitch0

esxcfg-vswitch -A 'Service Console' vSwitch0
esxcfg-vswitch -v 55 -p 'Service Console' vSwitch0 (adds VLAN55 to the Service Console)

esxcfg-vswif -a -i 10.44.12.2 -n 255.255.248.0 -p 'Service Console' vswif0

Check your results with:

esxcfg-vswif -l
esxcfg-vswitch -l

Edit the host IP address in the /etc/hosts file (use: #nano -w /etc/hosts)

When done, restart the network with:

service network restart

For changing the default gateway, edit the /etc/sysconfig/network file. Or use the command:

esxcfg-route ip-of-gateway

Reboot the server when done.

See which physical nics are connected to a switch
This command can be handy if you're not quite sure which of your physical nics have in fact been cabled to a switch:

esxcfg-nics -l

Retrieve CDP (Cisco Discovery Protocol) info from service console
With this command you can access CDP info from the COS. This is useful if, for example, your network department has not trunked the proper VLANs through and they want to know exactly which switches and ports are connected to your ESX host.

First enable CDP in both listen and advertise mode (default is only listen, so network dep can't see the nics):

esxcfg-vswitch -B both vSwitch0

vmware-vim-cmd /hostsvc/net/query_networkhint more
(insert 'pipe' before the 'more' command, I can't display it here)

look for the following lines:
device = "vmnic0"
devId = "switchname.bla.com"
portId = "GigabitEthernet9/28" (if it says FastEthernet or just Ethernet it is a 100 Mbit and 10 MBit port and the cable should be changed to a Gigabitethernet port)

Monday, April 13, 2009

Howto: Power off or kill a VM that is stuck

If you have a VM that is stuck and you can't power it off via Virtual Center, then here's some usable commands for troubleshooting and killing the VM from the Service Console:

Show running VM's:

vm-support -x
vmware-cmd -l

See the current state of a VM:

vmware-cmd /<path-to-vmx-file> getstate

Show running processes related to a given VM:

ps -auxwww grep <name-of-VM>
(Remember the 'pipe' character before grep-command - I can't display here...)

If you see an 'S' next to the process, then it can be killed. If it's a 'D', then the process is defunct and you may have to reboot the ESX server to kill the process.

Kill the proces, and thereby the VM:

kill -9 <process id>


Links to relevant threads:

http://communities.vmware.com//message/1219151#1219151

http://communities.vmware.com/thread/87797

Sunday, April 12, 2009

Howto: Extend system partition with Diskpart

Diskpart is a useful tool for extending logical Windows partitions (typically d-drive) which are not system partitions (c-drive) from within Windows without having to boot on a PXE-cd and rearrange partitions with e.g. Partition Magic. See here for Diskpart instructions.

Here's a workaround for extending the system or boot partition with diskpart (this will only work if the c-drive is the only partition on the .vmdk file). The logic of it is to take the whole .vmdk file and attach it to another VM as a second disk. This way Diskpart will let you extend a system partition:

1. Shut down the VM on which you whish to extend c-drive (c-drive-VM)
2. Create a new temporary VM (temp-VM)
3. Create a new disk on the temp-VM and choose 'Attach existing .vmdk file'. Browse for the .vmdk file of the c-drive-VM
4. Edit settings for the temp-VM and chose the newly added disk and resize it to new size.
5. Boot temp-VM and extend using Diskpart (you may need to assign a drive letter to disk in Disk Management)
6. Shut down temp-VM
7. Delete disk from temp-VM
8. Now the disk has been extended but it c-drive-VM it still shows as the original size. Therefore, delete the disk from c-drive-VM and add it again. This way, the correct disk size will show.
9. Boot c-drive-VM. Done.

Now, maybe this is not a super elegant way to go about it, but if you have a temp-VM ready then it's probably a little quicker than using the old way...

Friday, April 10, 2009

Configuration of iSCSI in VMware VI3

Introduction

The purpose of this post is to describe how to configure an iSCSI SAN in a VMware virtual infrastructure 3.5 with software initiator.

The prerequisites for this instruction are that the network and storage system has been configured and that you have received the following information:

ESX Hosts

  • ILO IP and credentials
  • IP address for ESX host
  • IP address for VMotion
  • FQDN for the ESX host (should be able to resolve)
  • Is ethernet traffic VLAN tagged (then you need VLAN ID) or is it only access ports?
  • Subnet, gateway, DNS servers
Storage (typically set up in closed network, 192.168.1.x/24)
  • IP addresses for the storage targets (typically 2 or 4 targets)
  • IP address for the Service Console on ESX
  • IP address for VMkernel (iSCSI) on ESX
  • Subnet and gateway
  • Make sure a LUN is made available by storage group
Read the “iSCSI Design Considerations and Deployment Guide” from VMware for detailed instructions. Just search on Google for it.

Furthermore, ensure that you have two separate NICs in the ESX host that can be used for storage. So, if it’s a Blade, then 4 NIC’s for Ethernet traffic and the two last on mezzanine card 2 for storage. The NICs can be of any type and make since the iSCSI initiator is software based and controlled by ESX on top of the NIC.

Instruction steps

0. First, below is a typical storage architecture:

1. In VI client: Make sure the ESX server is licensed for iSCSI and VMotion under Configuration -> Licensed features

2. Under Configuration -> Networking add a new virtual switch that will be used for storage. Attach the NIC’s you want to use.

3. Click properties for the new vswitch and add a Service Console 2 (COS2). Give it an ip address and subnet (typically local ip.). This second service console will receive the gateway of the first Service Console (a routable gateway ip). This is fine as it is not to be used in COS2.

4. Click properties for the new vswitch and add a VMkernel which will be used for iSCSI traffic. Label it iSCSI. Type in ip address and subnet.
After VMkernel is created enter properties for it and enter VMkernel Default gateway. This gateway ip should be the same as the IP address of COS2. So VMkernel points its gateway to the local service console.
Do not tick the box for VMotion use.


5. When done, the network configuration could like dump below:


6. Make sure the vmkernel has a gateway under “DNS and routing”


7. Go to security profile and enable software iSCSI client through the firewall:

8. Go to configuration -> storage adapters and click on the vmhba and click “properties”


9. Click Configure and then tick the “Enabled” check box and click OK.


10. On the Properties page for the software iscsi adapter, choose the Dynamic Discovery tab and enter the ip addresses of the storage targets (static targets are not supported for software initiators.)


11. Now, from the storage adapters page, rescan the HBA’s and verify that you see 2 or 4 targets (storage targets)


12. From Configuration -> Storage add the new LUN or LUN’s

13. When you have added a LUN, right click it and choose properties

For a MSA2012i with two Storage Processors (SP’s) with each to ports, there will be 4 targets (Update: In 3.5 U3 I've seen same setup but only two visible targets - but live SP fail-over works fine still). There will be 2 paths (typically on Fiber HBA’s, there are 4 because each HBA is represented with each two paths). With software initiator, there is one logical initiator and then two physical NICs teamed in the vSwitch. The initiator has two paths to two targets on the same SP.
14. Tricks:
  • Make sure that all targets can be pinged from COS2. SSH to the ESX host. From the console, SSH to COS2. From there you can ping the targets
  • If it’s a HP Blade 3000/7000 enclosure, make sure connections between the two switches used for storage are allowed (done by network department)
  • Jumbo Frames: If you are to enable it, remember to change it on all relevant parts: Storage, Network, ESX (on Switch and Port groups). Jumbo frames are not necessarily supported by the physical NIC’s. on the BL460cG1, the built-in NIC’s are supported but the HP NC326m, for example, is not. To enable jumbo frames from console, type following two commands:
    VMkernel command: esxcfg-vmknic -a -i 'ip-address vmkernel' -n 'netmask vmkernel' -m 9000 'portgroupname'
    vSwitch command: esxcfg-vswitch -m 9000 'vSwitchX'
  • Check outgoing ESX traffic: From the console, you can, when you rescan for new HBA’ and VMFS volumes, check if there is any traffic from the ESX to the targets (run command simultaneously with rescan)
  • Netstat –an grep 3260
Example:
[root@vmtris001 root]# netstat -an grep 3260
tcp 0 1 192.168.1.12:33787 192.168.1.2:3260 SYN_SENT
tcp 0 0 192.168.1.12:33782 192.168.1.4:3260 TIME_WAIT
tcp 0 1 192.168.1.12:33788 192.168.1.3:3260 SYN_SENT
tcp 0 0 192.168.1.12:33779 192.168.1.1:3260 TIME_WAIT