Showing posts with label Windows. Show all posts

Wednesday, February 3, 2010

Differences between Windows Server 2008, SP2, and R2

So what are the differences between win2k8, win2k8 SP2, and win2k8 R2? These naming conventions and differences between versions are a constant cause for confusion. So here's the short take:

Win2k8 was first released with SP1. Later on came Win2k8 SP2.
Win2k8 R2 is the new version of the OS that introduces several new features. It has the look and feel of Win7, it is only x64 bit, and Hyper-V Quick migration (~VMotion) is introduced.

There's no SP2 installed on top of win2k8 R2. R2 is a clean install or you can upgrade from SP2 to R2. In any case, the SP2 will disappear and it will only be called R2.

The reason for pointing this out is that it was a bit different with win2k3. Here, you installed SP2 and then you installed R2 on top of SP2 and the result was win2k3 SP2 R2 - so service pack and R2 at the same time.

I found this comparison somewhere and I quite like it (not quite sure how correct it is, though..)

Windows Vista SP1 ~ Windows Server 2008 SP1

Windows Vista SP2 ~ Windows Server 2008 SP2

Windows 7 ~ Windows Server 2008 R2

Thursday, December 24, 2009

P2V pre-migration checklist - and considerations

My prevoius post was a P2V post migration checklist. This post is a pre-migration checklist which is about all the information that should gathered and checked before doing any P2V conversions.

I have been involved in a number of larger P2V projects (+50 P2V's) and, in my experience, proper planning is a key element for a succesful project. Typically, you, as a VMware- or P2V person, have no real knowledge of the Windows servers to be converted - their just another server. This means that you rely on other people to collect relevant data on your behalf. Such a setup has an important implication. As you have no knowledge of the server, it cannot be released into production by yourself, you should let a Windows guy verify the OS after which it can be handed over for application testing. Resources for both tests should be allocated up front by the project manager and they should be standing by in the agreed maintenance window.

In regards to the length of maintenance windows, we have had the most succes with long time frames during weekends - e.g. 36 hours from Saturday 08.00 a.m. to Sunday 08.00 p.m. Obviously, such a window can be difficult to obtain, but it has two significant advantages: 1) Specifying the actual conversion time can be tricky - it happens that a 30 GB server takes 12 hours to convert for one reason or the other. 2) It is less stressfull to do P2V's during weekends and a long window will let you work at your own pace, Furthermore, conversions can run over night if they have large disks (e.g. + 200 GB).

Now, a few words about the checklist. Over time, it has been gradually extended as we have learned important lessons - some of them the hard way where. For example, a server that hadn't been checked for hardware dongles, then you need to roll back - or e.g. a VLAN that hadn't been properly trunked... A specific list will match a specific scenario so, typically, the list will be modified to some degree for each project. However, a large part of the list will remain the same, so hopefully it can be used for inspiration. We use Sharepoint 2007 to organise the lists. These can be dynamically updated, which is practical when multiple persons have to update at the same time.

  • Servername
  • OS type
  • Server model
  • Has Capacity Planner run for this server?
  • # of CPU sockets
  • # of CPU cores
  • Amount of physical memory installed
  • Physical disk capacity (C-drive, D-drive, etc.)
  • Current CPU usage (preferably from cap. planner)
  • Current memory usage (preferably from cap. planner)
  • Current physical disk usage (C-drive, D-drive, etc.)
  • # vCPU’s that should be assigned
  • Amount of memory to be assigned to VM
  • Sizes of vDisks after resizing (C-drive, D-drive, etc. – remember separate .vmdk’s for each logical volume)
  • Total size of vDisks (then you can sum up total disk capacity needed and ask for storage up front)
  • Local administrator credentials (local windows accounts are recommended)
  • “Ipconfig /all” screendump attached to list (this is to ensure you have the right IP and mac address)?
  • ILO-information (address, credentials) (if you have to do cold migration)
  • Has server been defragmented (this can significantly speed up conversion rates)?
  • Has server been checked for hardware dongles?
  • Has VLAN been trunked?
  • Do server application licenses have any binding to MAC or IP address?
  • Remote access type (RDP, Netop)? (for stopping services up front)
  • Physical server location
  • Applications on server
  • What services to stop on server before conversion
  • OS tester contact info
  • Application tester contact info (for pre- and post migration test)
  • Server to be converted by (employee)
  • Date for conversion
  • Conversion progress/status (not begun, P2V begun, handed over to OS testing, released to production, etc.)
  • Has physical server been shut down?
  • Notes

Friday, September 11, 2009

Howto: Removing a disk from a VM - howto identy the right disk?

From time to time, we need to remove disks from a VM. If there's only two or three disks attached to the VM, it's typically not a problem figuring out which one to remove e.g. if the disks have different sizes. But if you have seven or eight disks and they are the same size, then it's a bit more tricky - let's say if you're asked to remove the 'E-drive'. Under 'Edit Settings' for the VM, the disks only have a number which does not necessarily correspond with anything within the VM.

So how to identify exactly which disk that corresponds with a given volume within Windows?


The match can be made by looking at the SCSI target ID for the disk - this can be identified both in WIndows and under 'Edit settings' for the VM (A VM can have four SCSI controllers with up to 15 disks on each controller, so a maximum of 60 disks per VM).

To identify SCSI target ID within the VM:
Go to Computer Management -> Disk Management
Right click a disk and choose Properties


On the General tab you will see the Bus number (SCSI controller) and the Target ID (SCSI target ID), note the number - in this case below the ID is 4.


To identify SCSI target ID from the VI client:
Now go to 'Edit Settings' for the VM under and locate the disk with the corresponding target ID (see Virtual Device Node for the disk). Make sure the that the controller number and SCSI ID is the same. In this case it is Hard Disk 5 that have SCSI ID 4.

Shut down the VM to remove the disk.

Thursday, June 11, 2009

P2V of domain controller

Summary: Cold clone P2V of domain controllers works just fine.


We had to migrate two root domain controllers the other day at work. I knew that domain controllers in particular can give you trouble when being converted / migrated, so I researched it a bit and found a useful article on yellow-bricks.com which linked to a very good VMware KB article . This KB recommends that in stead of migrating, then deploy a fresh VM and do a 'dcpromo' and then shut down the physical server after. I like this way as it moves the responsibility away from the VMware team and over to the application responsible.

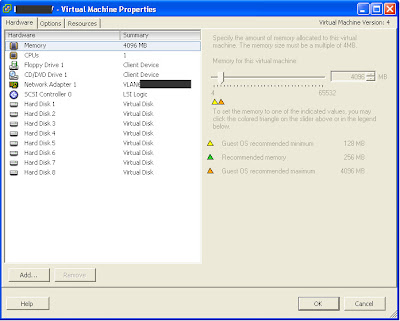
However, we did not have enough time to do the recommended solution, so we whent for P2V. We did cold clone because hot migration is likely to go wrong and it is not supported by Microsoft.


There were 
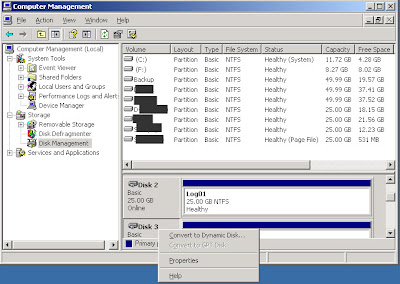
FSMO roles on the DC's, so before we began, we had the AD guy move all the roles over to one of the servers. Then we took the other one down and P2V'ed it. We resized the disks to save SAN space which was not a problem. When it came back up, the AD guy tested and then moved FSMO roles over to the migrated DC. And then we migrated the other one. After both had been migrated, the AD guy tested again.


If your responisbility area does not cover the application layer, which it does not for me in this case, then arrange for an application responisble to test the app before it is released into production. It may sound banal, but it is sometimes overlooked when the pace is fast and only basic OS testing is done.


Time synchronization


There are several ways of setting up time synchronization. One important point is that there should be only one source for synchronization for all the DC's. There's a feature in VMware tools, where you can synchronize the VM against the ESX - this we did not use. We let Windows take care of the synchronisation. If you have a mixed environment of DCs (bare metal and virtual), then you can let a bare metal DC sync to an external source, and then let all the other DC's sync to the bare metal DC.


We had the PDC emulator sync with a dedicated physical NTP server, and then let the second DC sync with the PDC emulator. The ESX servers sync with the physical NTP server - but no synchronization between VM and ESX server. Read this article for further info on time sync.

Update: In a KB article (KB 888794) from Microsoft about considerations when hosting DC's in a virtual environment, there is one important paragraph about forced unit access (FUA) which has resulted in some confusion. The paragraph states:

"If the virtual hosting environment software correctly supports a SCSI emulation mode that supports forced unit access (FUA), unbuffered writes that Active Directory performs in this environment are passed to the host operating system. If forced unit access is not supported, you must disable the write cache on all volumes of the guest operating system that host the Active Directory database, the logs, and the checkpoint file. "

According to VMware, forced unit access (FUA) is supported on VMware. Here's the answer from VMware technical support:

-----Original Message-----
From: VMware Technical Support [mailto:webform@vmware.com]
Sent: 24. februar 2010 11:25
To: (Jakob Fabritius Nørregaard)
Subject: Re: VMware Support Request SR# 1490632591

** Please do not change the subject line of this email if you wish to

respond. **

Hello Jakob,

Forced Unit Access is supported by VMware. A large number of customer's have virtualized Domain Controllers which is evident in the community forums.

Thanks & Best Regards

Derek Collins

Technical Support Engineer

VMware Global Support Services

1-877-486-9273

VMware Technical Support Knowledge Base

http://kb.vmware.com/kb"

Monday, June 1, 2009

iSCSI on a Windows box with Starwind

If you want to run shared storage in e.g. a test setup, then Starwind's iSCSI application can be recommended. Earlier, I have tried Openfiler (iSCSI in a linux distro VM) which works fine, It's not too complicated to configure, but still it's much easier with Starwind iSCSI in a Windows environment. The application is free but there's a 2 TB storage limit.


Starwind installation guide. It's easy to install, just go next next done. Load the serial key, connect to the localhost (user: test, pw: test), add a new device, and then follow install guide page pp 5.


For a guide on how to configure iSCSI in ESX 3 and 4, click here

A typical test setup could be one physcial host with 8 GB of memory and one quad core cpu. Check vm-help.com for a list of compatible whitebox ESX hardware.

From ESX 4 it's possible to run ESX as a VM within an ESX. Even VMotion will work (go to vcritical.com for a demonstration). And if you have a VM with an iSCSI target running on it, then you have a full enterprise setup running on one box.

Wednesday, May 20, 2009

P2V - Error with NIC after migration with static IP

When doing a P2V and the server has to have a static IP address after the migration, then you may recieve an error message stating that there's an IP conflict and the ip is already configured on an existing NIC - even though only one VMware NIC is visible in network connections.

The reason is that the physical NICs have not been entirely uninstalled in Windows, they still exist in the device manager as hidden devices. Do the following to uninstall the hidden NICs:

Open a command prompt and type the following commands:

set devmgr_show_nonpresent_devices=1
start DEVMGMT.MSC

Click ‘View’ and then click ‘Show Hidden Devices’.
Expand the Network Adapters tree and right click the dimmed network adapter and click ‘Uninstall’ (You may also see a hidden 'RAS async adapter' device under NICs. This cannot be uninstalled. However, it doesn't matter as it doesn't influence the NIC issue, so just leave it).

Now you can configure the static IP with no errors.

Sunday, May 17, 2009

Making ISO's with MagicISO

MagicISO is a good tool for making ISO files. It's easy to use, just choose your files in an explorer like view make the ISO. In the free edition, there is a limitation on the size of the ISO's - around 300 MB. Get it at http://www.magiciso.com/ .

On another note, ISO's is an easy way of transferring files to a VM. It can cumbersome to transfer files to a VM via the network. Sometimes you have to go through one or more jumpstations. In stead, you can make an ISO of the files you want to transfer, and then mount the ISO directly to the VM from within the VI client.

PsTools: Remote execution of commands in Windows

PsTools is a number of command-line tools that lets you execute useful commands remotely. Below is a list of tools included in the package which is free and can be dowloaded from the MS Technet site .
I have found a number of these tools very helpful:
PsExec: Lets you execute commands remotely. Use this command to start a command prompt:

psexec \\'computer name or ip' -u 'user' -p 'password' cmd.exe

PsKill: If you have a server that are maxing out its CPU and it takes forever to RDP to it, then you can use first PsList to show running processes and then PsKill to stop the process which is using the CPU.

PsShutdown: If you want to reboot a server via RDP it often hangs in the process. And if you haven't got ILO, then your screwed if you haven't got physical access to the server. Normally it helps to RDP to the console (Start -> Run -> mstsc /console) but if not PsShutdown lets you shut down the server or reboot it.

If, for some reason, you can't execute the commands remotely, then a trick is to make an ISO file containing the PsTools and mount that ISO on the VM. That will make the tools directly available on the VM.


Wednesday, April 15, 2009

NLB in VMware

There's a lot of posts in the forums about Microsoft NLB (Network Load Balancing), and it can be quite confusing to figure out what's what. We had problems with it for months before we got it fixed. One of the reasons that it took so long is that there are two ways to go about it and one way is to tweak ESX vSwitch in an ugly way an the other is nice and neat but involves the involvment of the network department - I'll describe the latter solution.

First of let me state: NLB works just fine in VMware. It is not necessary to make any changes on the ESX server or in the vSwitch.

The following steps should be in place:

1. Install and configure NLB on your Windows server like you would in a physical setup.
2. NLB should be configured for multicast
3. A static arp entry needs to be added to the physical layer 3 switch or router that acts as default gateway (note the default gateway from within Windows) for the NLB nodes. If it's a Cisco switch, then the command will be like this (if it's not Cisco, then it may work without adding the arp entry...):

arp <ip of nlb cluster> <mac of nlb cluster> arpa

Adding a static ARP entry to the ARP table means that you're associating a specific IP address with a given multicast mac address. This is not automatically allowed in the Cisco switch/router and therefore such requests are dropped unless manually added.

If the default gateway happen to be a firewall and not a router or layer 3 switch (of the type Cisco PIX or Cisco ASA. Update 2010.10.28: It has been observed that ASA OS version 8.23 requires a static ARP entry. Use command: ”arp <interface> <Multicast IP> <Multicast MAC addr.> alias” Eksempel: arp dmz2 192.168.131.29 03bf.c0a8.831d alias ) then it is not necessary to add the static entry as these firewalls allow adding multicast addresses to the ARP table. If you're not sure weather default gateway device allows adding multicast addresses to the ARP table (meaning that it allows traffic to a specific IP address to be broadcasted to multiple ports on the switch/router), then log into the device and list the ARP table with the following command:

show ip arp

If the multicast mac address exists in the table, then you don't have to make any changes.

The configuration is done directly in Cisco’s ”privileged” mode. See screendumps below (thanks to Kim Rubeck for lending me the dumps):


A good resource on Vmware's site: Link to KB article

Thanks to Kim Rubeck for input!

Sunday, April 12, 2009

Howto: Extend system partition with Diskpart

Diskpart is a useful tool for extending logical Windows partitions (typically d-drive) which are not system partitions (c-drive) from within Windows without having to boot on a PXE-cd and rearrange partitions with e.g. Partition Magic. See here for Diskpart instructions.

Here's a workaround for extending the system or boot partition with diskpart (this will only work if the c-drive is the only partition on the .vmdk file). The logic of it is to take the whole .vmdk file and attach it to another VM as a second disk. This way Diskpart will let you extend a system partition:

1. Shut down the VM on which you whish to extend c-drive (c-drive-VM)
2. Create a new temporary VM (temp-VM)
3. Create a new disk on the temp-VM and choose 'Attach existing .vmdk file'. Browse for the .vmdk file of the c-drive-VM
4. Edit settings for the temp-VM and chose the newly added disk and resize it to new size.
5. Boot temp-VM and extend using Diskpart (you may need to assign a drive letter to disk in Disk Management)
6. Shut down temp-VM
7. Delete disk from temp-VM
8. Now the disk has been extended but it c-drive-VM it still shows as the original size. Therefore, delete the disk from c-drive-VM and add it again. This way, the correct disk size will show.
9. Boot c-drive-VM. Done.

Now, maybe this is not a super elegant way to go about it, but if you have a temp-VM ready then it's probably a little quicker than using the old way...

Saturday, April 11, 2009

How to extend D-drive in Windows with Diskpart

In stead of booting into PXE-boot and starting e.g. Partition Magic for rearranging disks, Diskpart can be used for extending a logical partition which is not the system partition, typically the d-drive.

1. Shut down the VM
2. Right click the VM, choose Edit Settings, click the hard disk, type in new disk size in GB, Click OK.
3. Start VM
4. Start a CMD prompt
5. Run: Diskpart
6. Run the following commands:

List volume
Select volume 2 (if volume 2 corresponds to D drive)
Extend
Exit

7. Done. Reboot to be sure.